Article Series
In the previous part of this series, I showed how you can use the HTML canvas element to implement the drawing area. In order to copy and paste images, the pixel-based image data needs to be converted to and from an exchange format such as PNG. For the copy and paste part, I will demonstrate the use of the Async Clipboard API. This API is supported on Google Chrome, other Chromium-based browsers such as Opera or Edge since version 62, and on Apple Safari starting from version 13.1 (support table on caniuse.com). At the time of this writing, Mozilla Firefox only allows writing plain text to the clipboard.
Image to Blob
Before we can copy to another application, it needs to be converted to an exchange format. The most compatible format that can be used in combination with the Async Clipboard API across all platforms is the PNG format (Portable Network Graphics). The canvas API offers a toBlob() method that creates a binary-large object (BLOB) from the current image data of the canvas. This method takes a callback receiving the generated blob as a parameter. It also allows specifying the target format and image quality. Unless specified, the target format is PNG.
					canvas.toBlob(blob => {
  /* do something with the blob */
});
Copying Images to the Clipboard
The blob can now be written to the clipboard. The Async Clipboard API offers the writeText() and write() methods on the navigator’s clipboard object to copy data. While the first method is a convenient method to write plain text to the clipboard, the second one can be used to copy arbitrary data—as long as the browser or platform supports it. Currently, Safari only supports plain text, HTML, URI lists, and PNG data.
The write() method takes an array of clipboard items. They are created by calling the ClipboardItem() constructor that takes an object containing one or more representations of the item, with the representation’s MIME type as a key. The write() method returns a promise that resolves when copying was successful and rejects if it wasn’t. For security reasons, you may only invoke this action as a part of a user gesture (i.e., a keypress or a click). Depending on the browser, the user may need to give their permission first.
					canvas.toBlob(async (blob) => {
  await navigator.clipboard.write([
    new ClipboardItem({ [blob.type]: blob })
  ]);
});
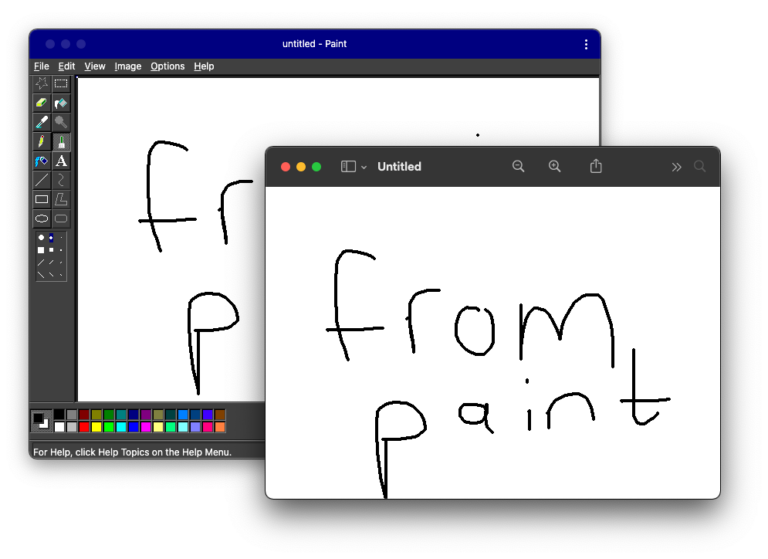
That’s all. With the help of Async Clipboard API, you can now copy your drawing to another application—for example, the macOS app Preview.
Pasting Images from the Clipboard
Let’s say you edited the image in the other application and want to paste the result back to the application, or you took a screenshot and want to edit it in Paint. In this case, the read() method of the Async Clipboard API is used. Again, the API also provides a readText() method for convenience. Reading back the data is a little more complicated, as you need to iterate over the list of clipboard items and their representations and pick the ones that match. Again, you may only invoke this action as a part of a user gesture, the user may be asked to allow reading from the clipboard, and the supported formats vary between browsers.
The following sample iterates over the items in the clipboard and their types. Whenever it finds a clipboard item with the image/png MIME type, it retrieves the blob data by calling the getType() method on the clipboard item.
					const items = await navigator.clipboard.read();
for (const item of items) {
    try {
      for (const type of image.types) {
          if (type === 'image/png') {
              const blob = await item.getType(type);
              /* draw image data from blob */
          }
      }
    } catch (err) {
        console.error(err);
    }
}
Blob to Image
In order to draw the image to the canvas, its pixel data must first be extracted from the exchange format in the blob. This is where the Image() constructor comes into play. It creates a new instance of the HTMLImageElement (<img>). This can be used to load an image from a URL. The canvas API provides a drawImage() method that takes an HTMLImageElement as a parameter.
However, as the image was pasted from the clipboard, there’s no URL that could be used as the image source. Fortunately, with URL.createObjectUrl(), the web provides a method to create temporary URLs that point to a blob in memory. After the image was successfully loaded, the temporary URL is revoked to prevent memory leaks, and the image data can be drawn on the canvas using the drawImage() method.
					const image = new Image();
image.onload = () => {
  URL.revokeObjectURL(image.src);
  context.drawImage(image, 0, 0);
};
image.src = URL.createObjectURL(blob);
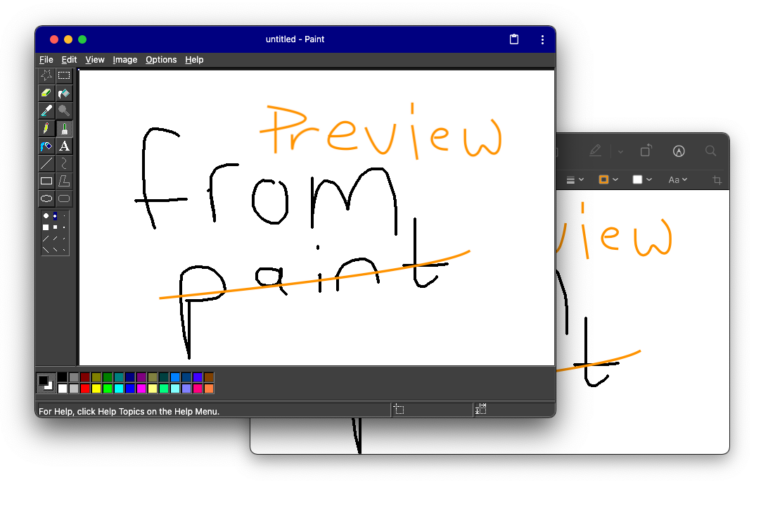
Et voilà! You can now paste images from other applications back to the Paint clone. In the sample application, this can either be done by pressing Ctrl+C/Ctrl+V, or by selecting the copy and paste entries in the application menu.
In the next part of this series, I want to show you how to save the drawings to the local file system and how to read them back. Furthermore, the Paint clone will be registered as a file handler for PNG files.

